


Table of Contents
- Why Green Grass Matters in Real Estate Photography
- How to Make Grass Green (Photoshop Tutorial)
- Bonus Tip: Add Shadows and Highlights for Realism
- Pro Alternative: Use Real Estate Photo Editing Services
Do you want to know how to make grass green in Photoshop and turn dull, brown lawns into lush, vibrant landscapes that make your property photos stand out?
Photoshop makes it easy to digitally revive lawns and bring them back to life.
In this step-by-step guide, you’ll learn how to make grass green in Photoshop using two effective methods: the Blending to Color technique and the COM (Color, Overlay, Multiply) method.
Before we dive into the editing process, let’s quickly understand why fixing the lawn color is so important.
Why Green Grass Matters in Real Estate Photography🌱
Nothing transforms a real estate image quite like a rich, green lawn. A full, healthy lawn instantly makes a home look well-cared-for and inviting.
-
-
-
It’s one of the simplest ways to improve curb appeal and attract more buyers to your listings.
A lush, green lawn signals that the property is well-maintained. It subconsciously tells buyers that the homeowners care about the space, which adds value and trust.
In contrast, yellow or brown patches can make a property appear neglected, even if the home itself is in perfect condition.
Vibrant greenery also helps balance the composition of an exterior photo by creating contrast with the home’s facade, the sky, and the driveway.
The result? A photo that feels fresh, harmonious, and eye-catching—everything a great listing photo should be.
Unfortunately, real estate photographers often face less-than-ideal conditions. You might be shooting during a dry spell, winter months, or after lawn maintenance has been neglected—all of which can leave you with pale, patchy, or brown grass.
That’s when post-processing is a lifesaver! Let’s take a look at how to make grass green in Photoshop.
Have You Ever Thought To
Outsource Photo Editing?
Try it today with 5 free edits from three professional photo editors.
How to Make Grass Green (Photoshop Tutorial)🌿
To get started, you can follow along with this step-by-step video tutorial or continue reading the text below:
Prepare Your Image
Step 1. Before jumping into Photoshop, start your workflow in Adobe Lightroom or your preferred RAW editor. Make basic adjustments to exposure, contrast, highlights, and shadows to ensure your base photo looks balanced.
Step 2. Then, right-click the image and select “Edit in Adobe Photoshop.” This will open your edited version directly in Photoshop, ready for detailed retouching.
Method 1: Blending to Color
The Blending to Color method is one of the fastest and most natural ways to make grass look green again. This technique works best for lawns that are mostly intact but slightly dry or yellow.
This is how to perform this technique in Photoshop:
Step 3. In Photoshop, duplicate the photo and add a blank new layer.
Step 4. Set the Layers Blending Mode to Color.
Step 5. In the Color Picker, use the Eyedropper Tool (I), select the right color to paint on. It should be close to the original. Find the right color by a little bit of trial and error.
Step 6. When you have the right color, it’s time to brush it onto the lawn.
Step 7. Add masking to the color layer to remove the excess color from the layer.
Step 8. Click OK to save.
This simple method instantly refreshes a dull lawn, giving it a subtle, even green tone without heavy editing. Let’s take a look at another method next.
Method 2: The COM (Color, Overlay, Multiply) Technique
If the grass in your photo is mostly brown or sparse, you’ll need a more advanced approach.
The COM method combines multiple blending layers—Color, Overlay, and Multiply — to create a richer, more dimensional look.
This method requires a reference image of a lawn you love. You’ll use it to blend realistic grass textures into your original image.
Here’s what to do:
Step 1. This time, you’ll need another photo of a lawn you really like.
Step 2. To start this process, duplicate the background image three times and adjust the lawn size and shape to match your original.
Step 3. First, adjust the color in one layer using 50-60% opacity. Next, change its overlay to 40% opacity. Change the last layer to multiply, and set its opacity to 40%.
Step 4. In the next step, you’ll do the Inverted Masking. Hold down the ALT button and click the Masking button to achieve Inverted Masking.
Step 5. Use a Pen Tool (P), or a Lasso Tool (L), and trace around the lawn you want to replace.
Step 6. Make sure to feather your selection (between 0.5% to 1.5%) so that the edges of your masking look smooth.
Step 7. Finally, press the DELETE button.
Once finished, you’ll have a lawn that looks naturally green, full, and photo-ready—perfect for MLS listings or marketing brochures.
Let’s now move on to some bonus tips to improve realism.
Bonus Tip: Add Shadows and Highlights for Realism🌾

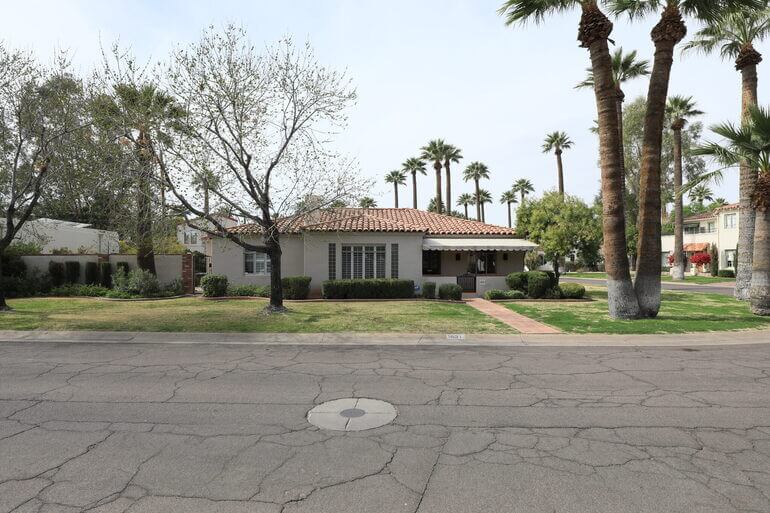
Before: Original Image 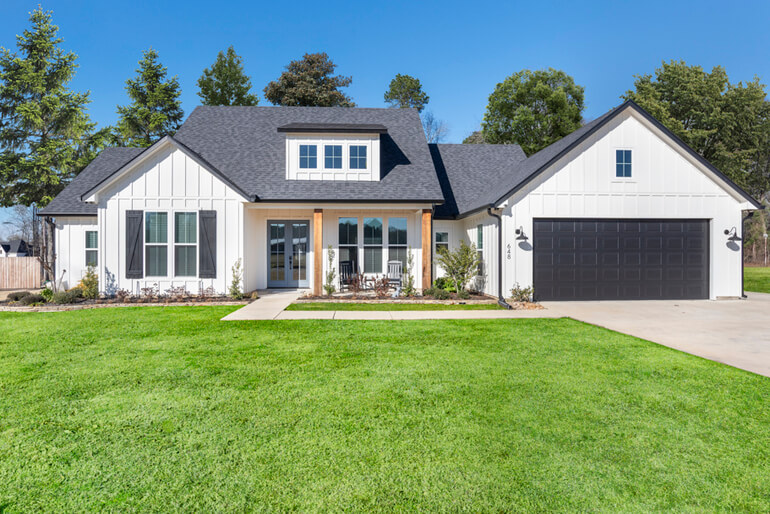
After: Grass Greening Editing by PhotoUp A common mistake beginners make is stopping once the grass looks green. To make your edits believable, pay attention to light direction and shadow consistency.
Here are some tips to consider to improve realism in your photos:
- Use the Dodge Tool to enhance lighter patches where the sun hits
- Use the Burn Tool to darken shadowed areas slightly
- And add subtle Noise (2–3%) if the lawn texture looks too smooth after coloring
These finishing touches prevent your edits from appearing flat or artificial.
Wrapping Up
Making grass green in Photoshop is one of the easiest ways to improve curb appeal and make your real estate photos stand out.
Whether you’re touching up minor dry spots with the Blending to Color method or completely restoring a dead lawn using the COM technique, Photoshop gives you full control to create beautiful, market-ready images.
And if editing isn’t your strong suit, don’t worry — PhotoUp’s team of dedicated editors can handle it for you quickly, affordably, and with consistent professional quality.
Let’s show you how to easily outsource your editing to the experts at PhotoUp.
Pro Alternative: Use Real Estate Photo Editing Services🌻
Before: Original Image 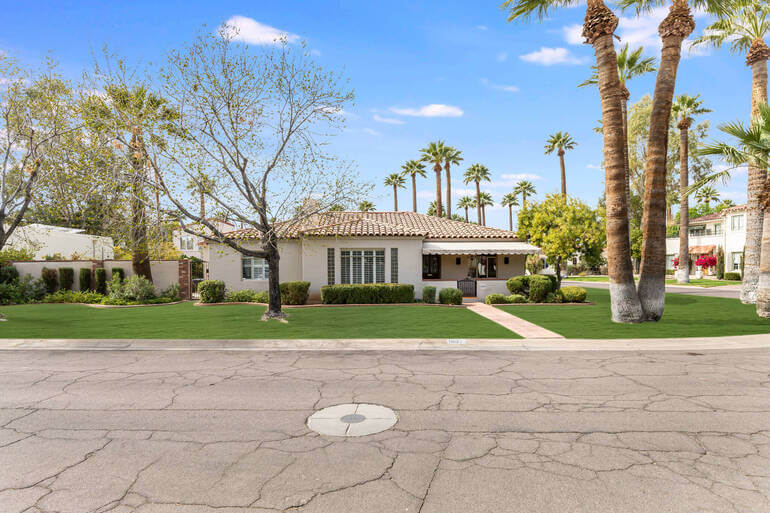
After: Real Estate Photo Editing by PhotoUp While these Photoshop techniques are effective, mastering them takes time and practice—especially if you’re processing large batches of photos for clients.
That’s where PhotoUp can help!
PhotoUp’s professional real estate editors specialize in transforming property photos, including:
- Making lawns green
- Enhancing skies
- Removing clutter
- Correcting perspectives
- Correcting lighting issues
- And much more!
With prices starting as low as $0.50 per image (for Dedicated Editing), you can save hours of editing time and deliver stunning results that impress clients and help homes sell faster.
Why Choose PhotoUp?
Still not convinced? Here are some reasons why you should consider outsourcing your editing to PhotoUp:
✔ Affordable Pricing – Starting at just $1.50 per image for on-demand editing, PhotoUp provides budget-friendly editing solutions for real estate professionals. ✔ Fast Turnaround Times – Get professionally edited images back in less than 24 hours, ensuring quick and efficient marketing. ✔ Advanced Editing Techniques – From AI virtual staging and sky replacements to twilight conversions and HDR blending, PhotoUp offers a wide range of editing services tailored to real estate photography. ✔ User-Friendly Platform – Easily upload images, manage orders, and provide feedback through PhotoUp’s intuitive online system. ✔ Dedicated Support – PhotoUp’s team of expert editors and customer service professionals ensures high-quality results and personalized service. ✔ Access to Dedicated Editing – With a Dedicated Editor, you get access to an editor or team of editors who are 100% dedicated to your business and learn your style. This ensures maximum image consistency, which can help you improve your brand. Browse Top Dedicated
Real Estate Photo Editors
Ready-to-hire editors for real estate photo editing, and more.
Wait! There are more reasons to choose PhotoUp…
Real Estate Marketing Ecosystem
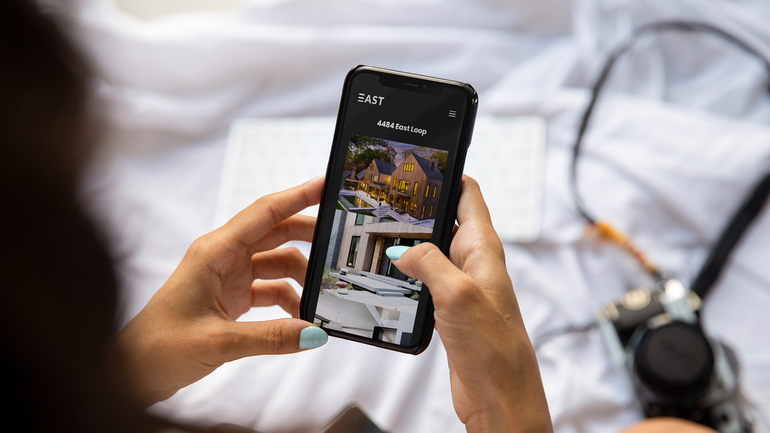
Single Property Website by PhotoUp Furthermore, PhotoUp has built an entire ecosystem around real estate photography. We also offer other powerful marketing services like:
We have everything you need to enhance and market real estate photography in one user-friendly software!
How to Get Started
If you’re wondering how to get started with PhotoUp, it’s super easy!
Here’s all you need to do:
Step 1. Sign up for a free PhotoUp account.
Step 2. Upload your photos to our easy-to-use software.
Step 3. Choose the level of editing that you need and provide instructions (optional).
Step 4. Wait for PhotoUp professional editors to edit and return the photos in less than 24 hours.
Step 5. Download and start using your beautifully edited photos.
As simple as that! Let your next listing shine with a lush, green lawn.
Sign up for a free PhotoUp account today and let every property you photograph shine with lush, picture-perfect greenery!
For a limited time, you’ll receive a bonus of 10 free credits you can use on any of our services when signing up for an account.
We hope this guide helped you learn how to make grass green in Photoshop. Please support our content efforts and check out the following related resources before you go:


