


Table of Contents
- How to Cut Hair Out of the Background in Photoshop
- 4 Tips to Edit Hair in Pictures
- Let the Experts at PhotoUp Do the Editing for You!
As a photographer, it is always important to take into consideration every detail of your work.
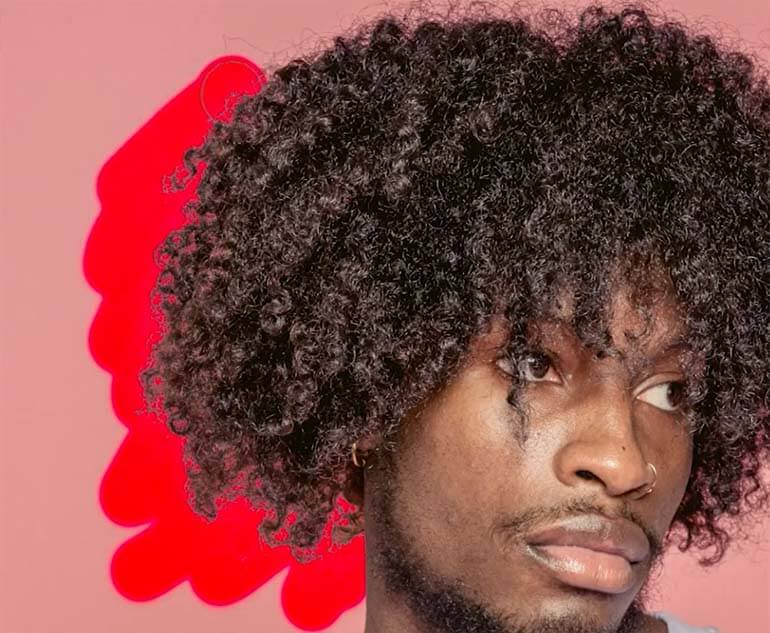
One of the most crucial elements to master is how to edit hair in pictures. Image retouching is not just about removing blemishes and smoothing the skin, you’ll also need to know how to clip hair from the background or make hair strands look natural and polished.
If this makes you a bit uneasy, we got you covered!
In this guide, we’ll show you some tips and tricks on how to edit hair in Photoshop, as well as cutting it from the background to help you achieve flawless results.
How to Cut Hair Out of the Background in Photoshop
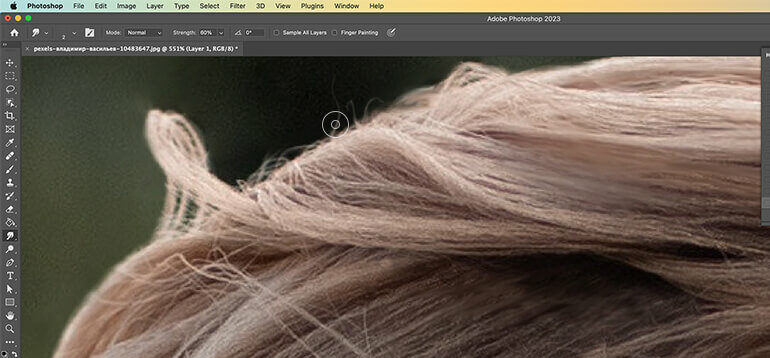
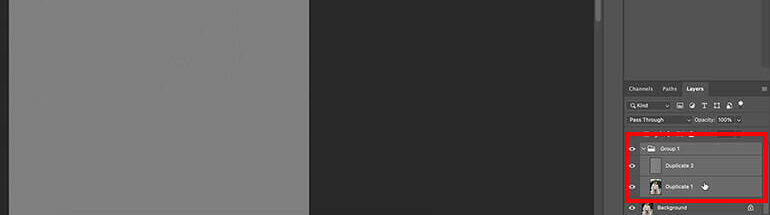
Before you start editing the hair, the first step is to cut it out of the background. In this example, we’ll do that using a clipping mask.
A clipping mask means that you’re using two layers, and the bottom layer controls the visibility of the top layer. In other words, the bottom layer is the mask, and the layer above it is the layer that’s clipped to the mask.
Difficult Background Removal in Photoshop – Product Clipping
To get started, you can either watch the video or continue reading the text below:
Step 1. Duplicate the photo and add a New Layer.
Step 2. Fill it with a solid color on the Adjustment Layer.
Step 3. Select the Background Eraser Tool and then use the Sampling once. You can adjust the tolerance later depending on how you want it.
Step 4. Change the limit to Discontinuous and check the Protect Foreground Color.
Step 5. Then, change the Foreground Color with the Hair Color. It’s advisable to choose the lightest color of the hair.
Step 6. Now, start Erasing the background. To do this, click the background for Sampling and then run it through the hair.
Step 7. Next, continue Brushing around the hair.
Step 8. When you’ve finished brushing the hair, use the other Eraser Tool to separate the body and the background.
Step 9. Then, use the Magic Wand Tool to select the remaining background and press Delete.
Step 10. To fix the pink color cast, add a New Blank Layer and clip it with the Main Layer.
Step 11. Change the Layer Mode to color, and then use the Brush Tool to change its brush mode to lighten with an Opacity of 20-30%.
Step 12. Next, press the Alt Key Button to pick the hair color and start brushing. To remove the color cast of the shirt, just repeat the previous process.
Step 13. Lastly, click on File and Save as PNG to save the picture without a background. Or you can choose a new background of your choice.
And that’s it!
Now that you know how to cut the hair out of the background, let’s take a look at some tips on how to edit hair in pictures next.
4 Tips to Edit Hair in Pictures
Here are 4 additional tips and tricks on how to edit hair in pictures using Photoshop.
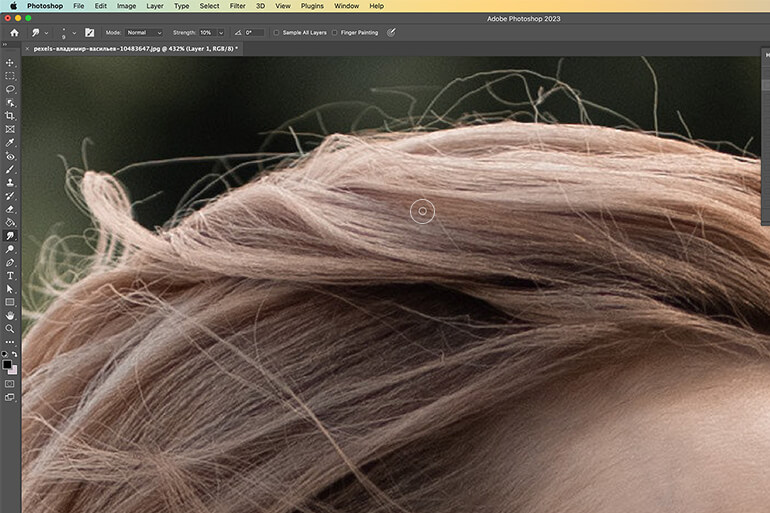
1. Using the Smudge tool
The Smudge Tool in Photoshop is a great way to blend hair strands together and make them look more natural.
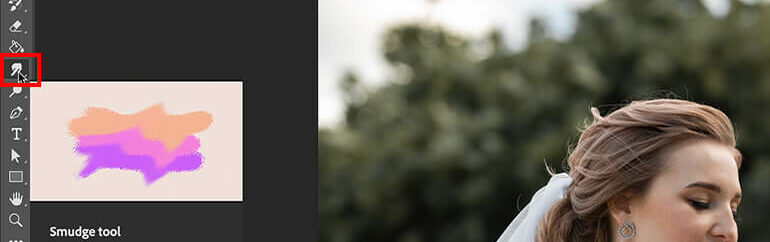
To start blending hair strands together, select the Smudge Tool from the toolbar to the left and adjust the size and strength according to your needs.
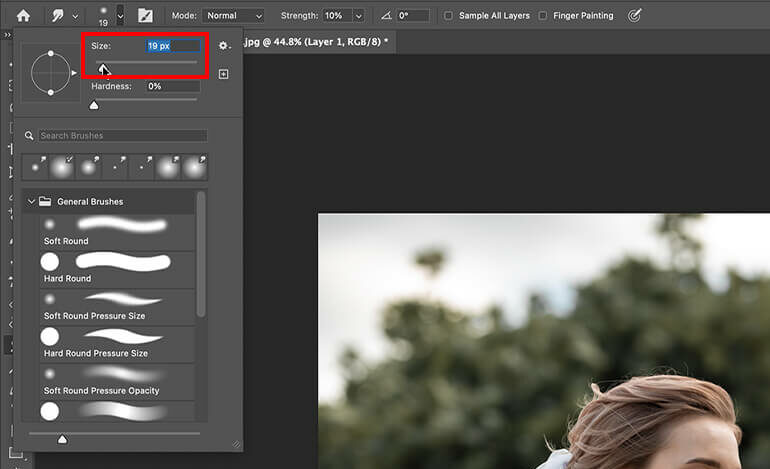
Then, brush over the hair strands in the direction in which they flow. You can also use the Smudge Tool to fix unwanted flyaways and blend them with the rest of the hair.
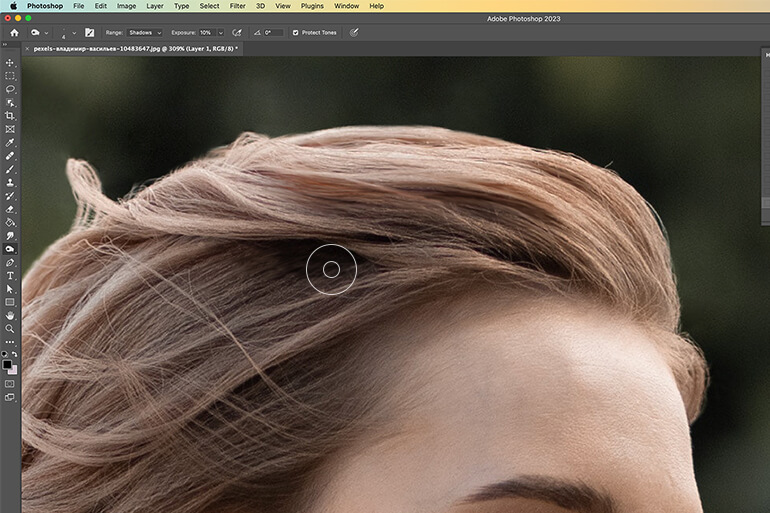
2. Dodging and Burning
Dodging and burning is a powerful technique for enhancing the highlights and shadows of the hair.
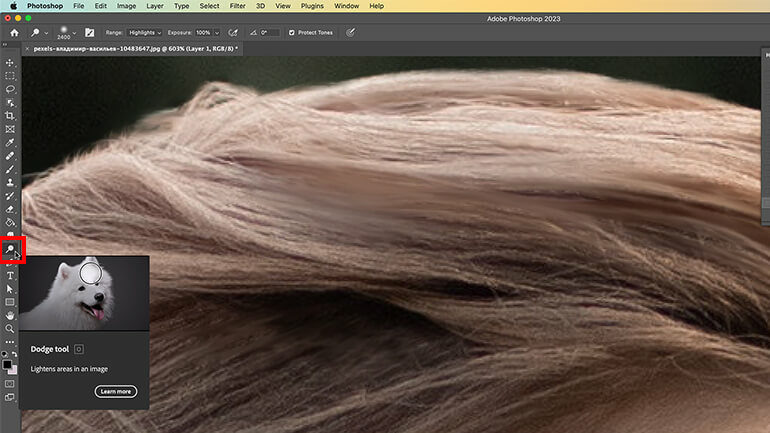
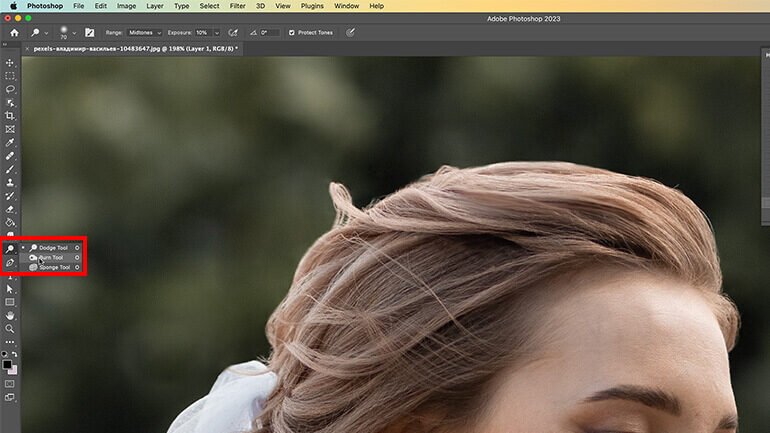
To get started using this technique, use a Soft Brush and the Dodge Tool to lighten the areas of the hair that catch the light, such as the ends and the top. This will add dimension and shine to the hair.
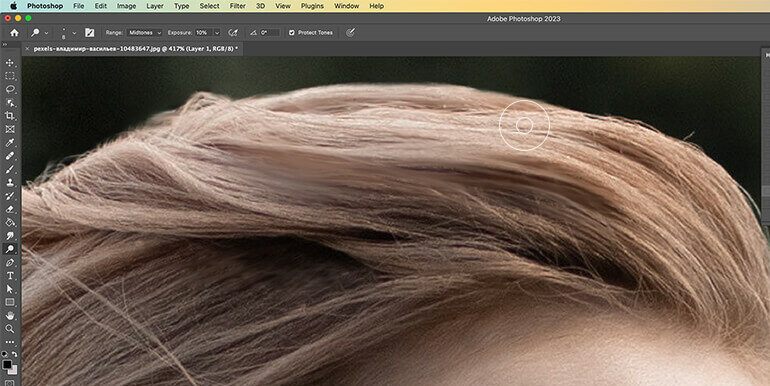
Then, switch to the Burn Tool and darken the areas that are in the shadow, such as the roots and the underneath to create depth and contrast in the hair.
Have You Ever Thought To
Outsource Photo Editing?
Try it today with 5 free edits from three professional photo editors.

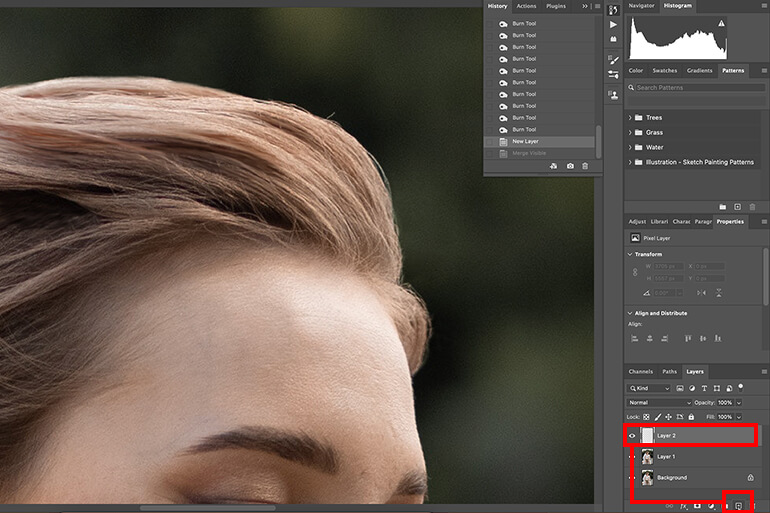
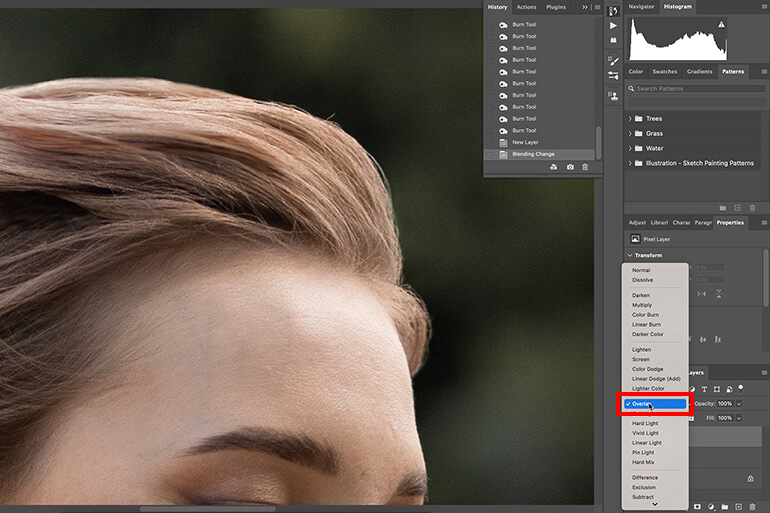
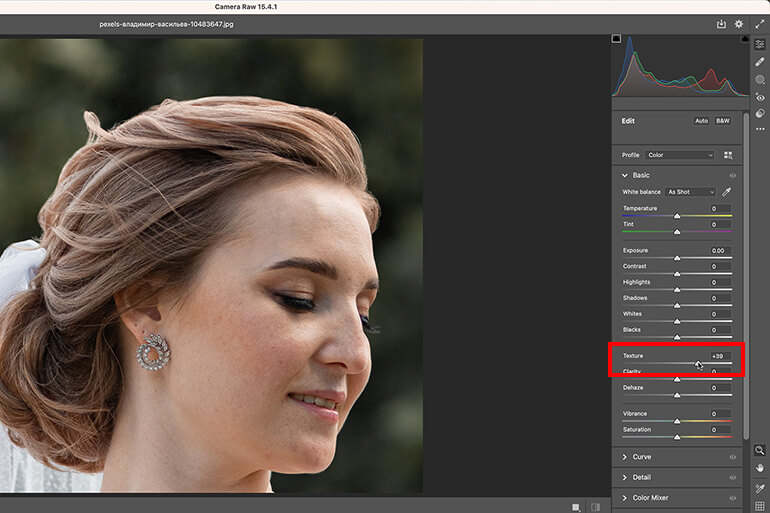
3. Adding Highlights and Texture
Adding highlights and texture is a simple yet effective way to take hair editing to the next level.
First, create a New Layer and change the Blending Mode to Overlay.
Then, select the Brush Tool and choose a soft white brush. Paint over the hair strands that catch the light, such as the tips and the edges.
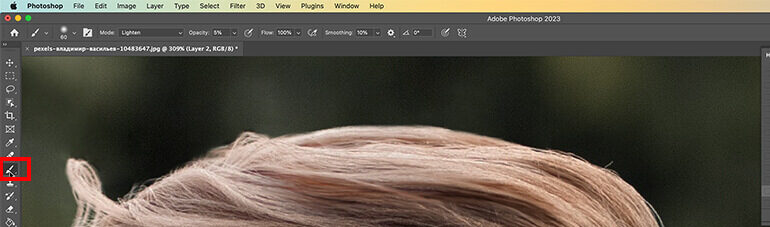
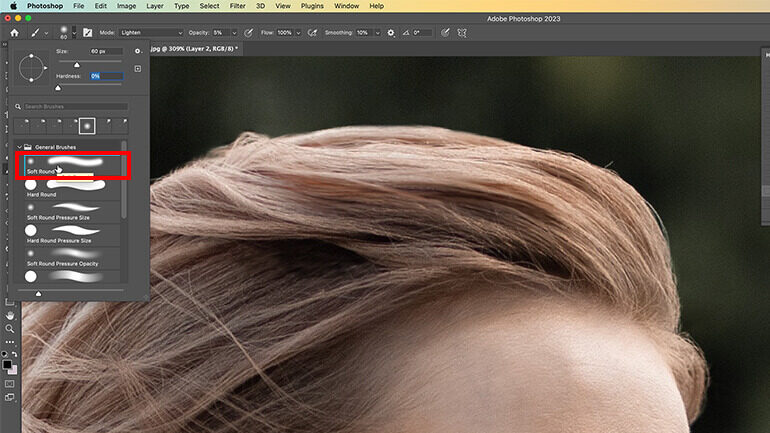
This will add highlights and a glossy finish to the hair. Additionally, you can also use the Texture Slider in the Camera Raw Filter to give the hair more definition and detail.
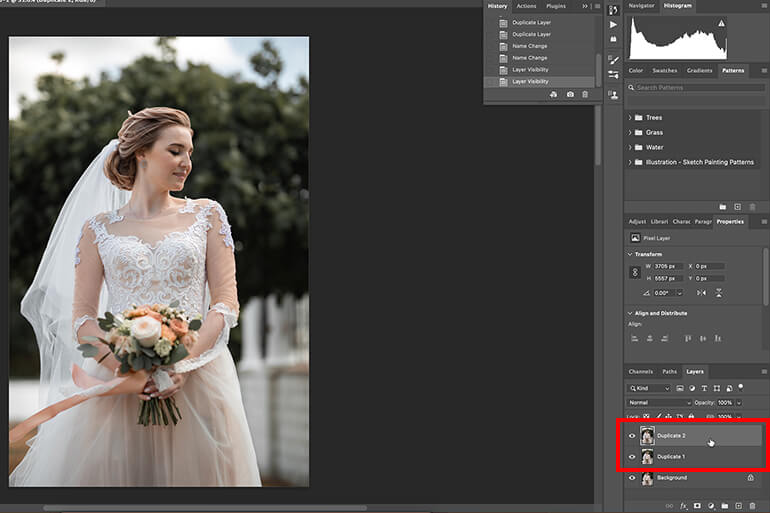
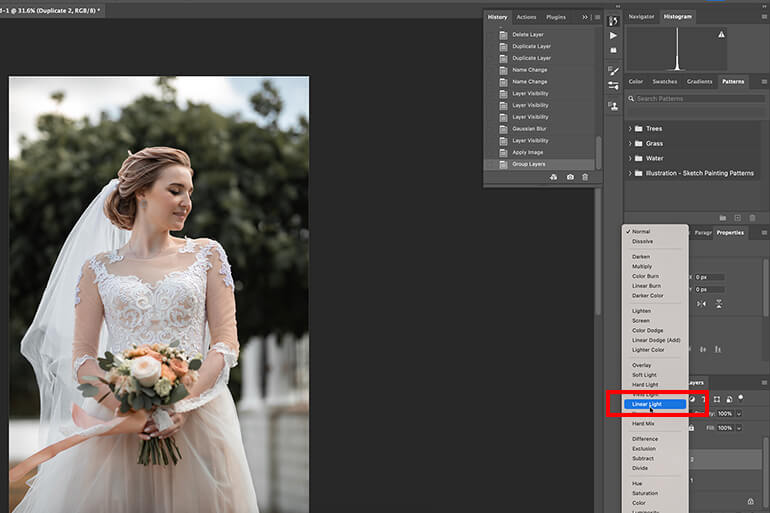
4. Using Frequency Separation
Frequency separation is an advanced technique that separates the texture of the image from its color. This can be useful when editing hair that is too smooth or too rough.
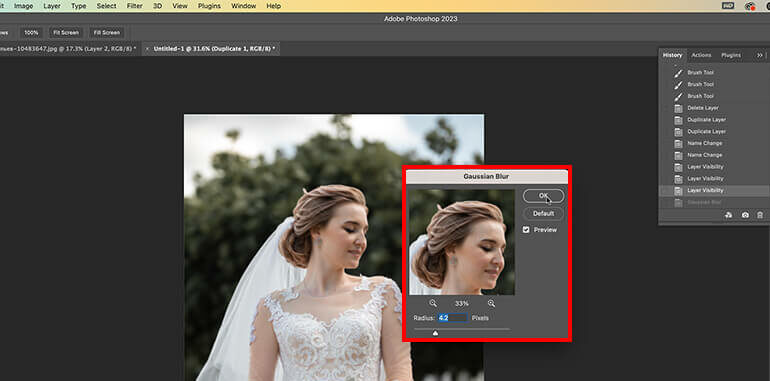
To begin, Duplicate the Layer that contains the hair.
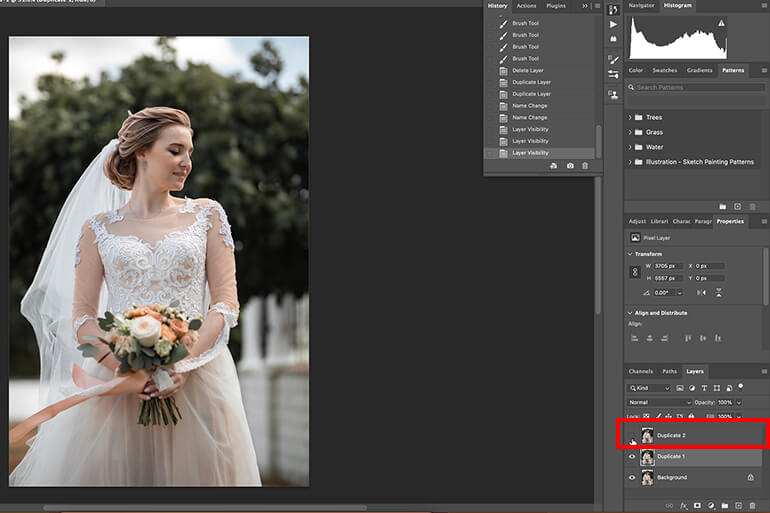
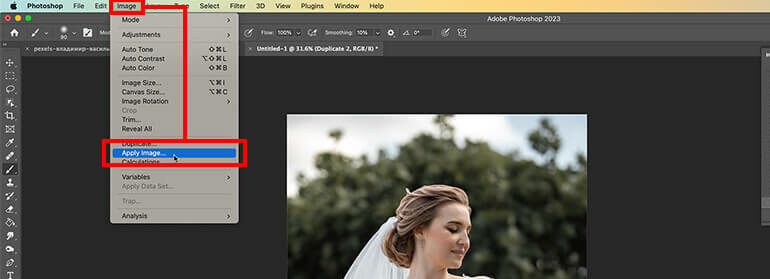
Next, apply a Gaussian Blur Filter to the duplicated layer until the hair looks like a smooth surface.
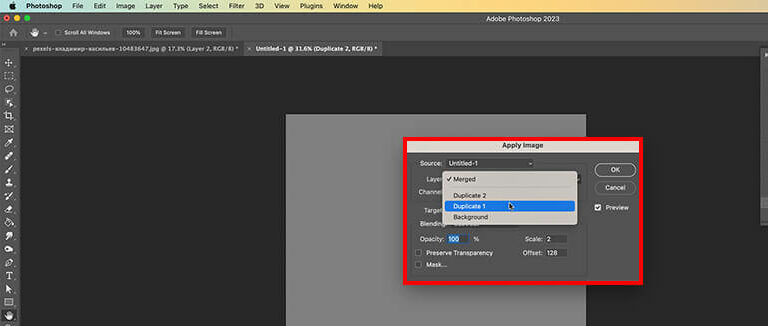
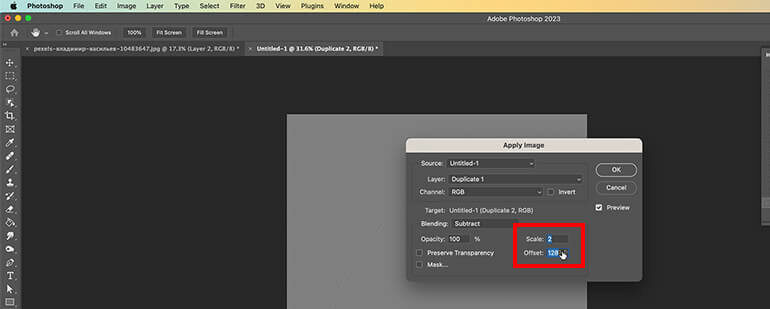
Once the hair looks smooth, go to Image > Apply Image and select the Blending mode to Subtract, the Scale to 2, and the Offset to 128.

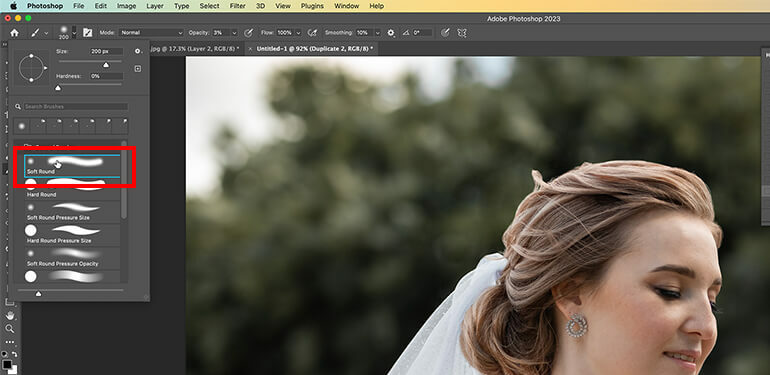
Then, create a New Layer between the Original and Duplicated Layer, and set the blending mode to Linear Light.
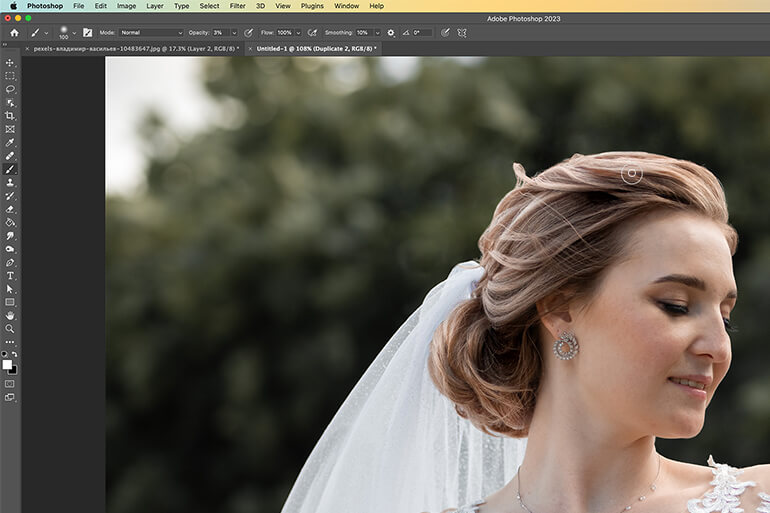
Lastly, you can then use the Brush Tool and adjust the Opacity to paint over the areas that need more texture.


Editing hair in Photoshop can seem overwhelming at first, but with practice and applying these tips and tricks, you can achieve professional results that will make your images stand out.
Remember to take your time and pay attention to the details, such as the direction of the hair strands and the highlights and shadows.
Have You Ever Thought To
Outsource Photo Editing?
Try it today with 5 free edits from three professional photo editors.
Let the Experts at PhotoUp Do the Editing for You!
With these techniques, you’ll be able to create realistic and beautiful hair that will elevate your photos.


However, editing hair in pictures takes a little bit of time and effort to practice. If you’re tired of spending that extra time and want help, we’ve got you covered!
At PhotoUp, we have a team of professional photo editors that are ready to take the editing off your plate, starting at the low cost of $1.10 per image depending on your subscription.
With over 10 years in the business and several hundred photo editors around the world, it’s hard to beat the quality, service, and pricing that PhotoUp offers.
No matter what kind of editing you need to outsource, our editors will ensure that your photos are of the highest quality.
Browse Top Dedicated
Real Estate Photo Editors
Ready-to-hire editors for real estate photo editing, and more.
Photo Editing Services
Here are some of PhotoUp’s photo editing services:
Real Estate Marketing Services
Except for photo editing, PhotoUp also offers additional real estate marketing services such as:
We have everything you need to enhance and market real estate listings under one roof!
Best of all, getting started using PhotoUp’s photo editing service is super easy.
All you need to do is sign up for a free PhotoUp account, upload your images, choose export setting and turnaround time, and that’s it.
So get started today and let PhotoUp help you create amazing visuals effortlessly!
We hope this post helped you learn how to edit hair in pictures. Before you go, make sure to check out the following resources as well:

