


Table of Contents
- Why Use Drones in Real Estate Photography?
- Always Shoot RAW
- How to Edit Drone Photos in Lightroom (4 Simple Tips)
- Leverage Expert Drone Photo Editing With PhotoUp
Are you looking for some tips on how to edit drone photos in Lightroom?
With high-quality drones, real estate photographers can produce stunning aerial stills and videos of a property without spending a fortune in actually riding a helicopter.
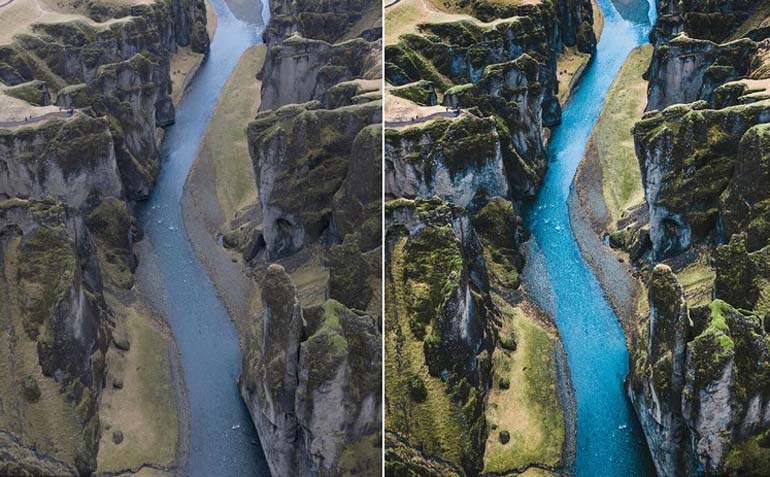
But to create high-quality aerial shots, it’s essential to maximize the detail and color in the image. In this post, we’re going to cover 4 simple tips for editing drone photos using Lightroom drone presets.
Why Use Drones in Real Estate Photography?
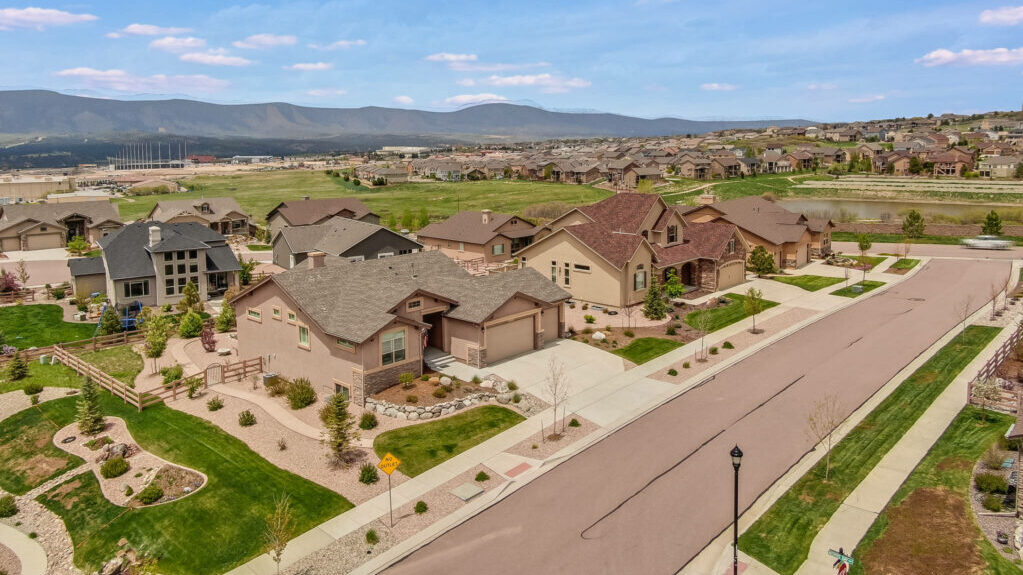
Today, aerial photos or drone photos are a must in real estate photography if you want to get ahead of your competitors.
Potential buyers want to see all aspects of a property before deciding whether to schedule a viewing, including an aerial view of the neighborhood and a property’s special features.
For example, consider these statistics:
- 7 in 10 agents report that drone photography, videos, and virtual staging are more important since the start of the pandemic.
- And 83% of home sellers prefer to work with a real estate agent who uses drone photography.
If that didn’t convince you, here are some more reasons why you should use a drone for your real estate photography:
- A drone gives you an encompassing overhead view of a property. It allows you to get to a vantage point higher than any ladder or tripod extension can provide.
- Drones make it possible to take photos at unusual angles, which can set you apart from other photographers.
- It offers an affordable way to take elevated photography. Before drones, only the wealthiest real estate photographers could afford to hire a helicopter service to take aerial shots.
- Aerial photos and videos make an impressive aerial tour that will surely delight a potential property buyer.
- Also, it establishes your reputation as an up-to-date and tech-driven real estate photographer who can shoot all types of photography.

To recap, if you want to step up your game and get ahead of other real estate photographers, you should consider offering drone photography.
High-Quality & Consistent
Real Estate Photo Editing
Hire a dedicated editor with performance metrics from $7/hour.

Always Shoot RAW
You should always shoot RAW, which is the uncompressed and unprocessed version of a photograph.
RAW provides more information about a photo and allows for non-destructive and more detailed editing.
A JPEG, on the other hand, is a processed and compressed image, which will become of lower and lower quality the more you edit it. But with RAW, you can edit your image as much as you’d like without ruining it.
To shoot RAW for DJI drones, you simply navigate to “Settings” and click the “Camera Icon.” Then, you click “Image Format” and “RAW”.
How to Edit Drone Photos in Lightroom (4 Simple Tips)
With that said, let’s take a look at 4 simple tips on how to edit drone photos using Lightroom drone presets.
1. Apply Signature Lightroom Drone Preset
Lightroom presets are an excellent way to simplify your photo editing workflow. And to make future drone editing easier, you should begin by creating a signature drone present that best fits your style.
Basically, any presets you save will be available the next time you use these specific tools in Lightroom. This will help you to improve your workflow and save you valuable time.
To simplify the process, we recommend that you use the Lightroom Presets for Aerial & Drone Photography by North Landscapes, which is designed to accentuate strong and dramatic colors.
In other words, this will give you the best color and detail out of the photo.
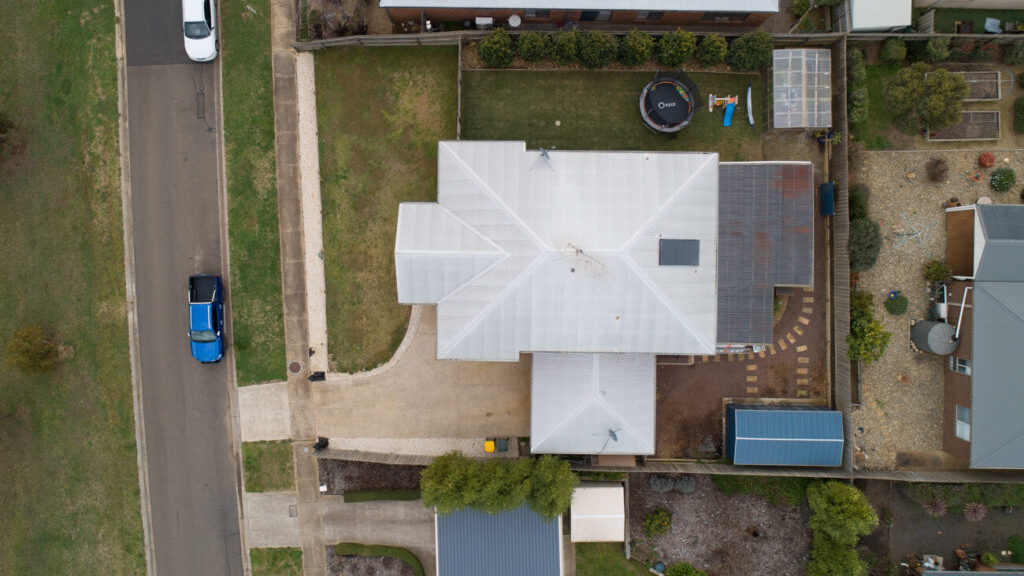
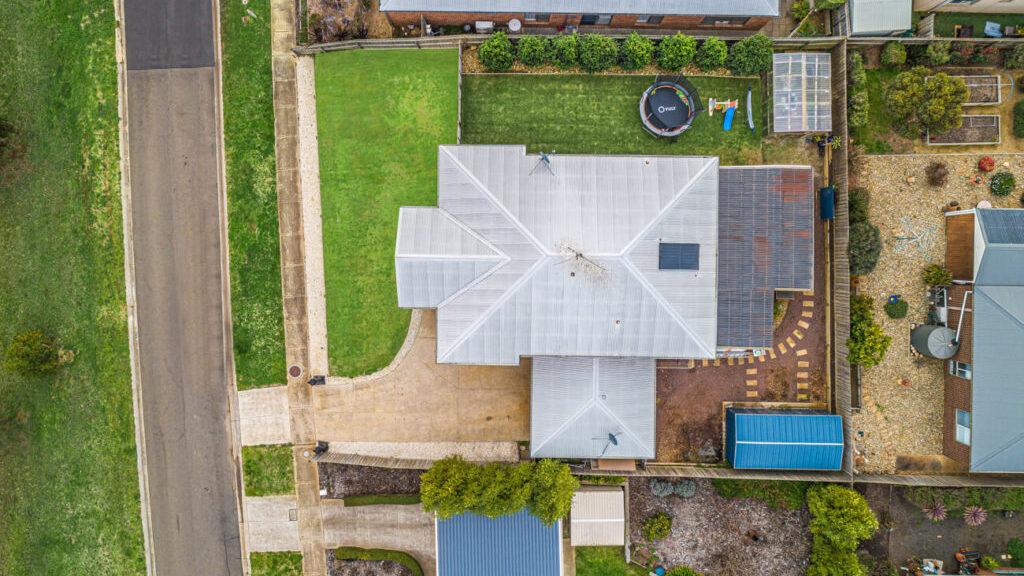
2. Use the Radial Filter Drone Preset
The Radial Filter does an excellent job of dodging and burning the image without you having to spend time manually brushing it. Even though this feature is mostly used for portraits, it’s also excellent for aerial and landscape photography.
To create a Radial Filter, click and drag the mouse across the area you want to add it to. This will create an elliptical shape, indicating what area of your image is either affected or excluded from the adjustments you perform.
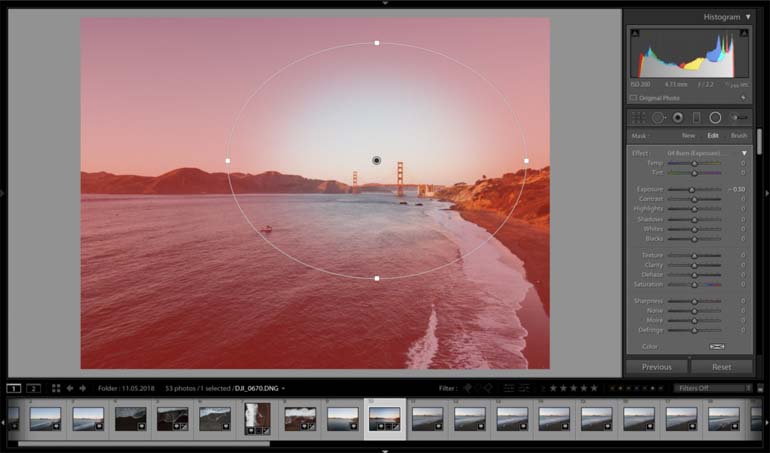
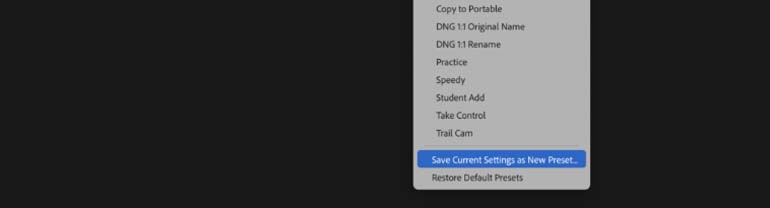
When you’re done editing, simply save your current settings as a New Preset.
The Radial Filter is a must-have drone preset that will save you lots of time and make your aerial shots pop.
3. Add a Graduated Filter Drone Preset
Graduated Filter or now called the Linear Gradient Tool is mostly used to darken or make a sky bluer or darken, as well lighten the edges of a photo.
You can find this tool under the Masking icon in the toolbar. Specifically, on the right side of the Develop Module, between the Basic Panel and the Histogram.
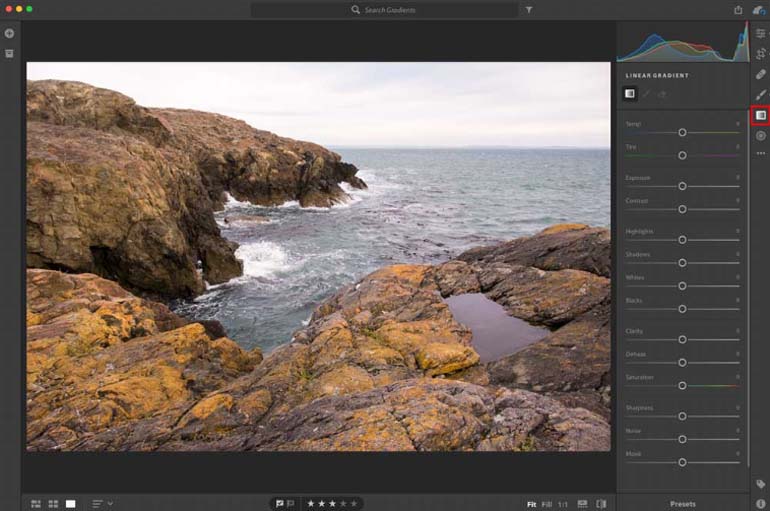
When adding a Graduated Filter drone preset in Lightroom, there are two main features you should include:
- First, you need a Temperature Gradient to emphasize color.
- And then an added Clarity Adjustment to bring out the details in the sky.
The Graduated Filter present will help you accentuate epic sunsets and blue skies. It’s also good to target a specific area, without affecting the exposure of the image as a whole.
4. Change the Perspective of the Image
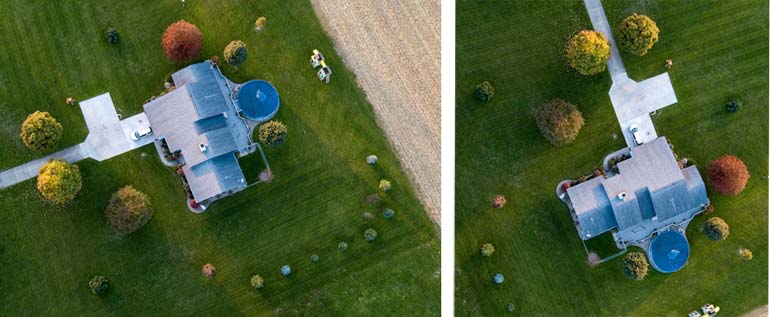
Just a simple trick like rotating your image to change perspective can go a long way to create stunning aerials.
With the use of social media, a new trend has developed to present images in portrait orientation instead of the traditional landscape orientation.
Overall, it’s a quick and easy way to switch things up and present a different perspective of your drone photography.
The bottom line is that there are many ways to individualize your drone photography and make your real estate photos unique.
Whether it is done through Lightroom drone presets or composition, just let your creativity flow and it’ll help you create stunning aerials.
Have You Ever Thought To
Outsource Photo Editing?
Try it today with 5 free edits from three professional photo editors.
Leverage Expert Drone Photo Editing With PhotoUp
Real estate photographers and their agent clients are increasingly turning to drones to capture some of their most spectacular listing photos.
However, using a drone doesn’t automatically mean you’ll have the best quality and sharpest images. Professional drone editing can make an average aerial photo look impressive.
So here’s where PhotoUp can help!
PhotoUp’s real estate photo editing experts can take any photo or video and make it truly stunning. Except for drone photo editing, our team can also help with the following issues:
- HDR editing
- Improper exposure levels
- Harsh shadows, lack of light, etc.
- Images that need cropping or other effects
- Color correction and image enhancement
- Lawn greening and sky replacements
- Noise reduction and ghosting
- Clutter and object removal
- Day-to-dusk editing
- Line and angle corrections, etc.
Browse Top Dedicated
Real Estate Photo Editors
Ready-to-hire editors for real estate photo editing, and more.
But it doesn’t stop there…
…PhotoUp is a non-stop-shop for real estate marketing and also offers other services such as:
Why don’t you try us out for yourself?!
For a limited time, you’ll get 5 free edits when you sign up for a PhotoUp account! Plus, the signup process is completely free and doesn’t require any credit card information.
With that being said, let us help you take your drone photography and real estate marketing to the next level.
You won’t regret it!
We hope this blog post gave you some useful tips on how to edit drone photos. If you liked this post, you may also want to check out the following resources:

