Table of Contents
- What Are ICC Profiles in Lightroom?
- Why Should You Use ICC Profiles?
- How to Add ICC Profiles to Lightroom CC
- Looking for Professional Real Estate Photo Editing?
If you want to print your images using Lightroom, it’s beneficial to install print paper profiles. This is a vital step if you are looking for color consistency in your printed images. A good ICC profile will help you create beautiful prints with excellent color quality.
In this tutorial, we’ll show you how to add ICC profiles to Lightroom CC. We’ll also cover what ICC profiles are and why it’s beneficial to use them.
Alright, let’s get started!
What Are ICC Profiles in Lightroom?

ICC (International Color Consortium) profiles are used to define the color characteristics of a device, such as a monitor, printer, or camera.
In Lightroom, ICC profiles can be used to ensure that the colors you see on your monitor are accurately represented in your prints or other output. Also, make sure you’re using high quality printer ink to avoid bad color output.
When you import a photo into Lightroom, the software automatically assigns an ICC profile to the image based on the camera and settings used to capture the photo. This profile is used to convert the raw image data into the colors that you see on your monitor.
You can also choose to apply a different ICC profile to your images in Lightroom. This can be useful if you want to adjust the overall color balance of an image or match the colors to a specific output device, such as a printer.
Why Should You Use ICC Profiles in Lightroom?
As mentioned earlier, ICC profiles are used to ensure color consistency and accuracy across different devices and output methods.

Without ICC profiles, the colors you see on your monitor may not match the colors in your prints or other output, leading to color discrepancies or color shifts.
Using ICC profiles can help you achieve more accurate and consistent colors in your images, especially when printing or displaying your photos on multiple devices or in different lighting conditions.
This is especially important for photographers who want to ensure that their images are accurately represented and that the colors match the colors they intended.
It’s worth noting that not all devices and output methods support ICC profiles, and the use of ICC profiles can sometimes result in a loss of color depth or image quality. However, in most cases, the benefits of using ICC profiles outweigh the potential drawbacks.
How to Add ICC Profiles to Lightroom CC
Now that you know what ICC profiles in Lightroom are and why you should use them, let’s show you how to add ICC profiles in Lightroom CC next.
You can either watch the video or continue reading the text below:
To get started, you can download the ICC profiles of a particular print paper that you use on their own website.
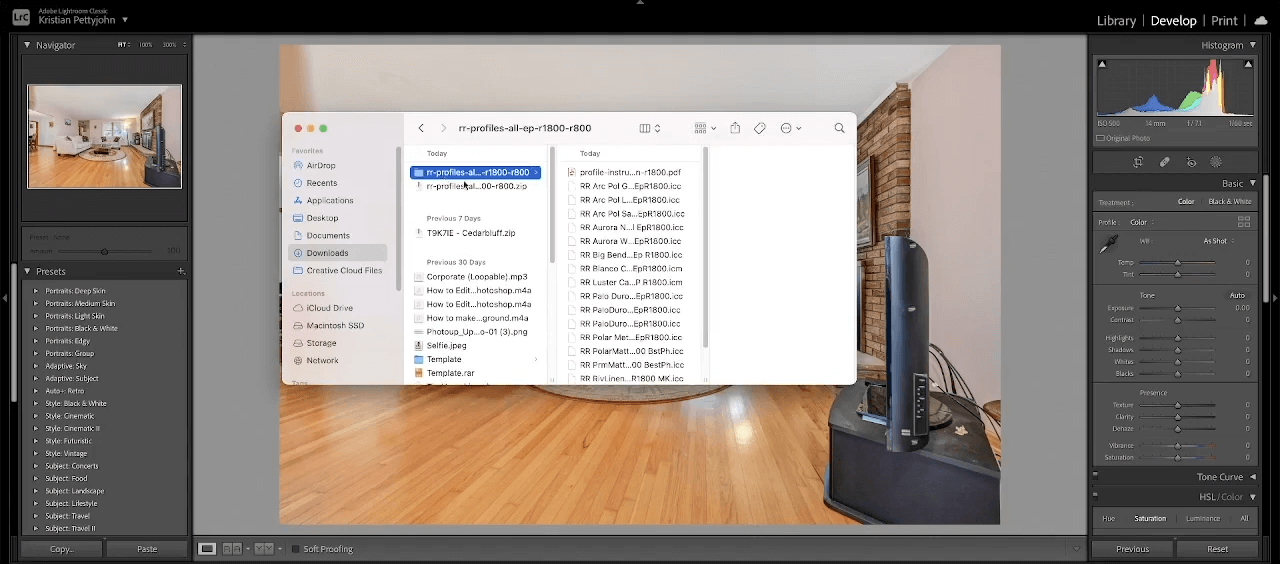
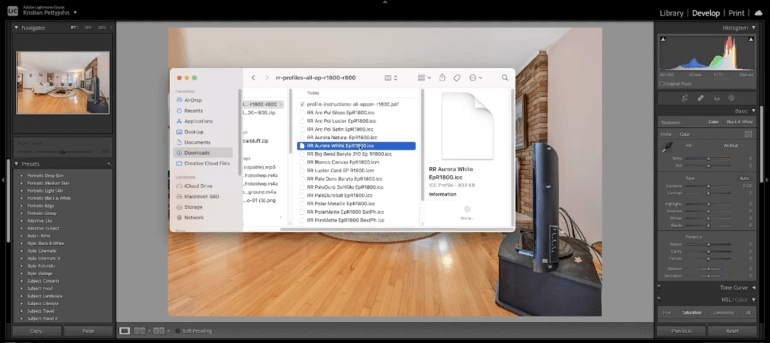
Step 1. Once you have downloaded the ICC Profile, locate it, and click Install.
Step 2. After downloading the ICC profile, you need to extract the files. Locate the specific Paper’s Profile that you want to use, and to do that, open your Hard Drive.
Step 3. Next, go to Library, Color Sync, and then Profile.
Step 4. Now, copy the ICC Files and paste them to the Profile Folder.
Note: For Windows users, just right-click directly on the ICC file and click install.
Checking Your Installed Profiles
Step 5. After installing, Restart Lightroom. There are two options to check if the profiles are installed successfully.
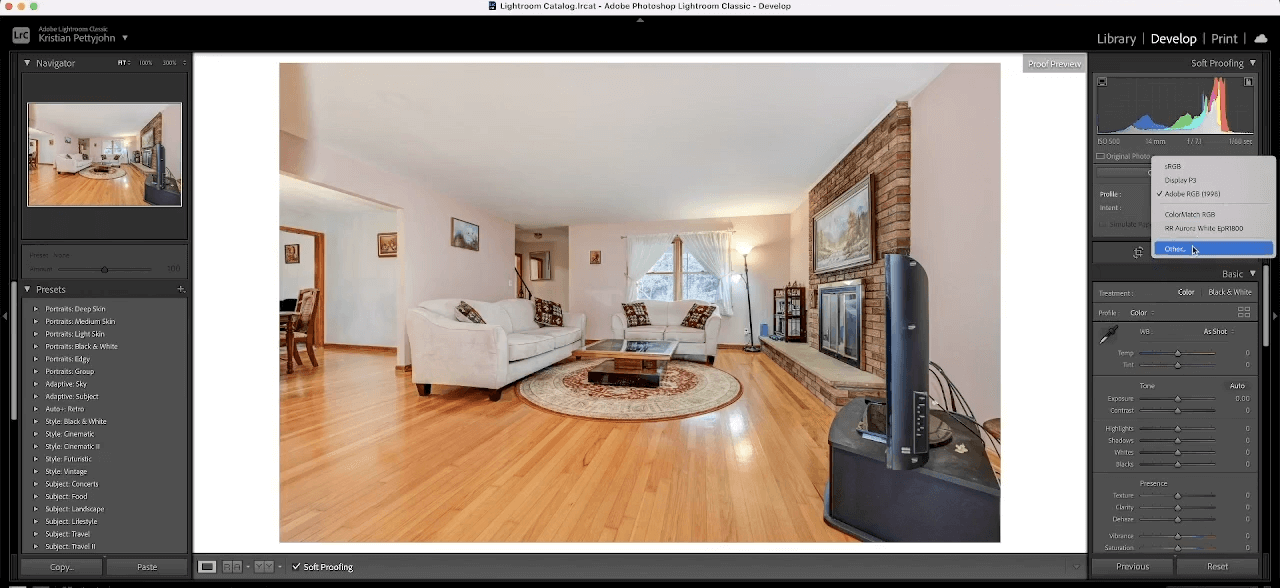
Step 6. First is the Soft Proofing. You can select the soft proofing feature by clicking on the Soft Proofing. The checkbox is found on the left-hand side in the Develop Module below.

On the soft proving panel, click the Profile drop-down and select Other. A pop-up will show you your newly installed profile, select it and click OK.
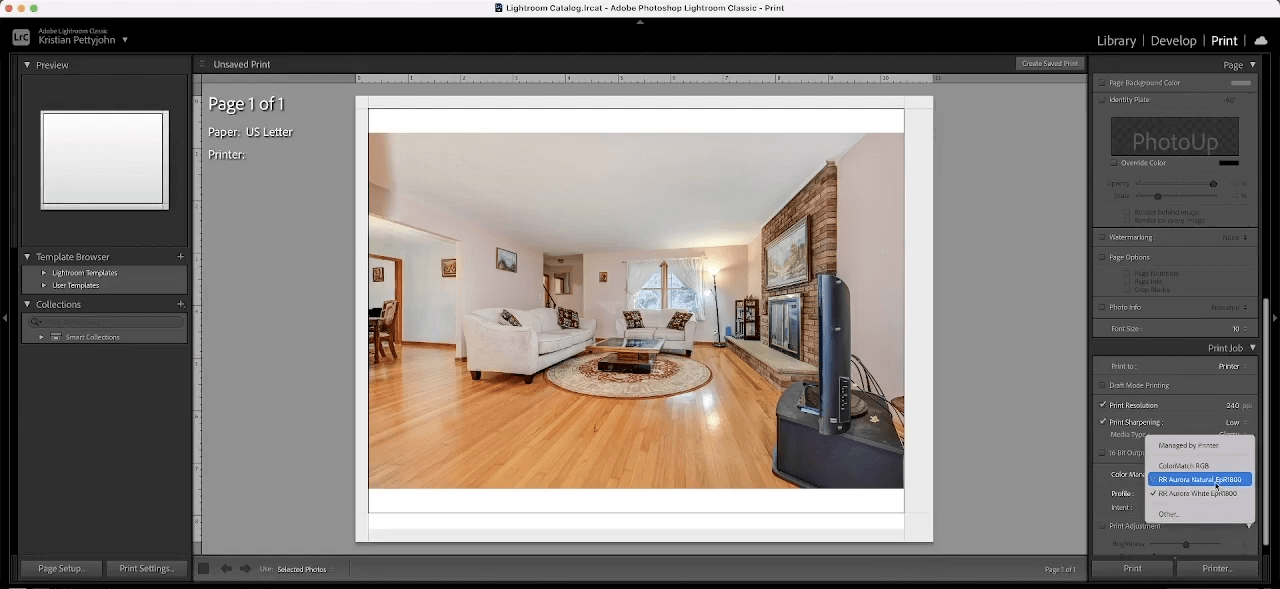
Step 7. Second, is the Print Module in Lightroom. First, decide on the Image Orientation in the paper size from the Page Setup option found on the left from the right-hand panel. Look for the Print Job Panel and expand the print job panel to go down to the Profile.

Click on the drop-down and select your Profile. If it isn’t showing in this list, go to Others. Your installed profile will be there in the pop-up. Click on it to select it and hit OK.
And this is how you install and add your ICC profile to Lightroom!
Looking for Professional Real Estate Photo Editing?


Based in the US with offices in the Philippines, PhotoUp is providing a full array of skilled, yet affordable, photo editing services for professional real estate and architectural photographers such as:
- Brightness and color correction
- Advanced object removal
- Day-to-dusk conversion and twilight editing
- Lawn greening and sky replacements
- HDR editing
- Manual blending
- Flambient editing
- Floor plans
- And much more!
But our services don’t stop there…


PhotoUp is a complete one-stop shop real estate marketing firm and also offers additional services like:
- Virtual staging
- Single property websites
- Property flyers
- Custom websites
- Video editing
- Virtual assistants
- And custom house portraits
PhotoUp’s team of real estate editors can handle any editing job — big or small, complex, or simple. And our pricing is also affordable, with most photo editing services starting at only $1.15 per image.
Browse Top Dedicated
Real Estate Photo Editors
Ready-to-hire editors for real estate photo editing, and more.
All you need to do is sign up for a free PhotoUp account, place your first order, and your professionally edited images will be delivered back to you in less than 24 hours.
PhotoUp Real Estate Photo Editing Uploader
To see how easy it is to get started using our software, you can check out our real estate editing uploader demo:
It’s as easy as 1-2-3!
Sign up for a free PhotoUp today, and give PhotoUp’s professional real estate editing service a try!
You won’t regret it when you see the final touches that make your real estate photography look stunning! It will also help you free up time you can spend on shooting more properties and growing your real estate photography business.
Best yet, for a limited time, you’ll even get 10 free edits when signing up!
We hope this blog post helped you learn how to add ICC profiles to Lightroom CC to ensure color consistency in your printed images. Before you go, you may also want to check out some related resources:


