


Table of Contents
- What Is the Smudge Tool in Photoshop?
- Use Different Brush Sizes for Variation in Intensity
- When to Use the Smudge Tool?
- How to Use the Smudge Tool in Photoshop (in 4 Simple Steps)
- Save Time With PhotoUp’s Real Estate Photo Editing Service!
Do you want to learn how to use the Smudge Tool in Photoshop?
The Smudge Tool in Photoshop can help you create a variety of unique artistic effects. Not only is it good for covering up small defects or blemishes in your real estate photos but you can also use it to enhance details or making your photos resemble an oil painting.
In this post, we’ll show you how to use the Smudge Tool in Photoshop in 4 simple steps. We’ll also cover what the Smudge Tool is and when to use it in real estate photo editing.
Let’s get started!
What Is the Smudge Tool in Photoshop?
The Smudge Tool is a feature in Photoshop that allows you to mix or blend the content in an area of an image. It produces an effect similar to the effect of dragging your finger through wet paint.
This amazing tool picks up the color of the place at which you click. It then pushes that color through the rest of the stroke as you drag, allowing you to mix and blend content in an image, just like painting on a canvas.
In other words, you can use this tool for creative effects that will make your real estate photography stand out from the crowd.
Use Different Brush Sizes for Variation in Intensity
With the Smudge Tool, you can digitally manipulate and blur areas of a photo to create fascinating effects.
It allows you to use different brush sizes for varying levels of smudging intensity. Use a bigger brush to smudge a larger area or decrease your brush settings when precision is needed.
As a real estate photographer, you can experiment with this powerful tool as part of the creative process, leading to stunning visuals that will draw in potential buyers.
When to Use the Smudge Tool?
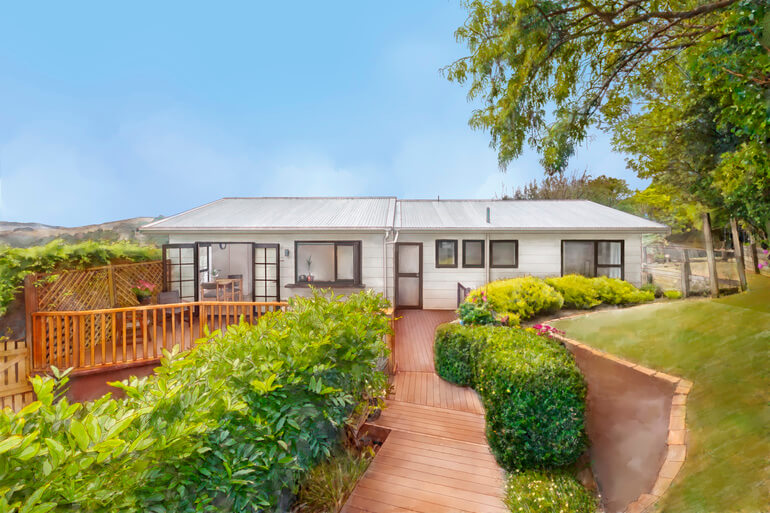
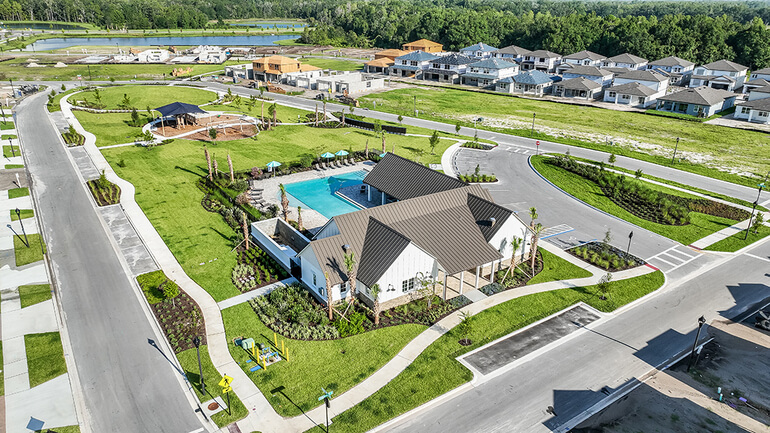
With the Smudge Tool, real estate photographers can create a stunning effect that looks like an oil or watercolor painting.
For example, have you seen PhotoUp’s beautiful custom house portraits that illustrate what you can do using this tool?
It’s also great for softening edges and hiding small blemishes to perfect any photo. For instance, you can smudge a nearby shade over the problem area so it’ll blend more readily into its surroundings.
Oppositely, smudge the dark color from a shadow into the image to create definition or make features appear smaller.
While smudging can add a creative and unique touch to your shots, it’s important not to go overboard.
Preserving detail is critical in real estate photography so start off small – use a light setting with the smallest brush size and gradually work up as you become more comfortable.
With enough practice, creating intriguing images that maintain crisp clarity will be easy!
High-Quality & Consistent
Real Estate Photo Editing
Hire a dedicated editor with performance metrics from $7/hour.

How to Use the Smudge Tool in Photoshop (in 4 Simple Steps)
With that said, let’s now take a look at how to use the Smudge Tool in Photoshop.
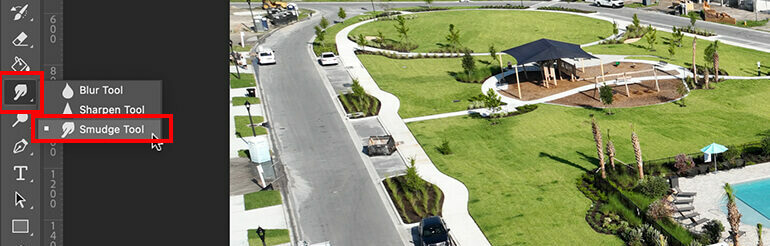
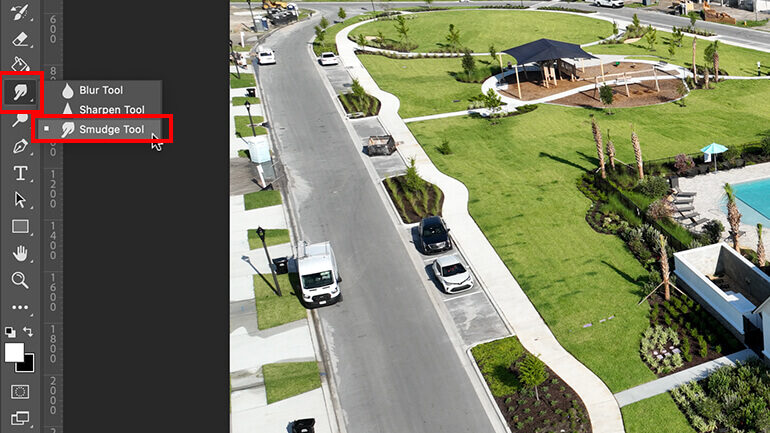
Step 1. Open your image in Photoshop, and select the Smudge Tool from the Toolbox and Tool Options Bar. If you can’t find the Smudge Tool, click and hold the Blur Tool to show the other related tools, and then select it.
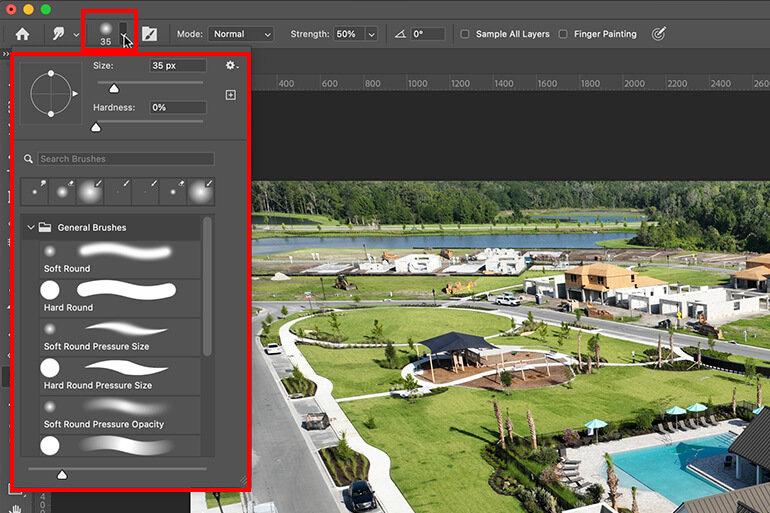
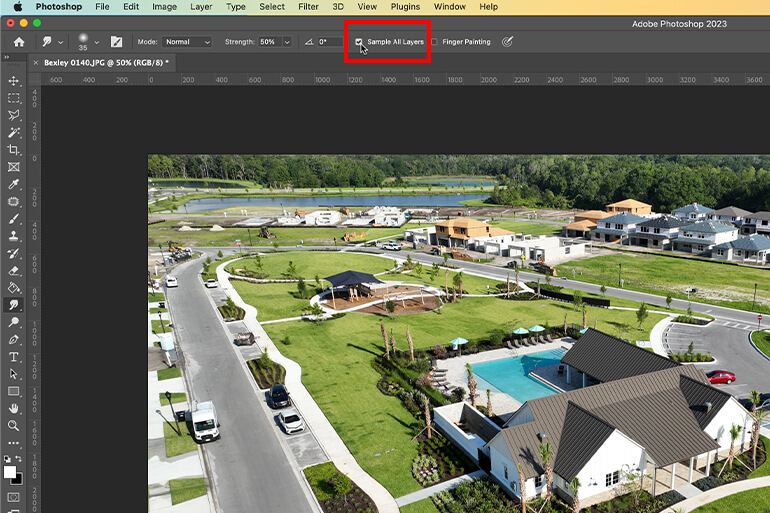
Step 2. In the Tool Options Bar, set the Brush Tip and other Brush Options like the size and hardness of the brush from the drop-down and slider available.

Step 3. Select the Sample All Layers checkbox in the Options Bar to smudge using color data from all visible layers. Deselect the option to only use colors from the active layer.
Step 4. To smudge using the selected foreground color at the beginning of each stroke, check the Finger Painting checkbox. And deselect Finger Painting to use the color under the pointer at the beginning of each stroke.
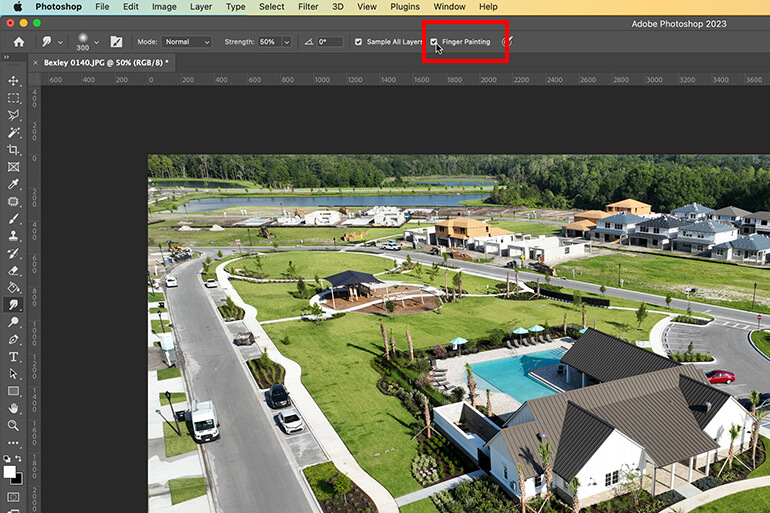
After setting your options, then click and drag in the image to smudge the paint where you click and drag.
And that’s it!
High-Quality & Consistent
Real Estate Photo Editing
Hire a dedicated editor with performance metrics from $7/hour.
Save Time With PhotoUp’s Real Estate Photo Editing Service!
If you don’t have the time or the expertise to learn Photoshop yourself, PhotoUp’s professional editors will gladly edit your photos for you.
All you need to do is sign up for a free PhotoUp account, place your first order and your photographs will be delivered back to you in less than 24 hours.
With over a decade in the industry and hundreds of editors in the Philippines, PhotoUp has all the expertise and tools needed to edit your images to perfection.
For example, our skilled photo editors can help with the following issues:
- Improper exposure levels
- Harsh shadows, lack of light, etc.
- Blurred images that were taken without a tripod
- Images that need cropping or vertical alignment
- Lawn greening and sky replacements
- Twilight and day-to-dusk editing
- Manual blending and pano stitching
- Clutter and advanced object removal
- Line and angle corrections
- And much more!
Browse Top Dedicated
Real Estate Photo Editors
Ready-to-hire editors for real estate photo editing, and more.
Additionally, PhotoUp offers a complete ecosystem of real estate marketing services such as:
Best of all, our real estate photo editing service is affordable, starting at the low cost of $1.15 per image.
And it’s super easy to get started!
PhotoUp Real Estate Photo Editing Uploader Demo
To see how easy it is to get started, check out our real estate photo editing uploader demo:
As simple as that!
Sign up for a free account today, and let PhotoUp take the editing off your plate. For a limited time, you even get 5 free edits when signing up!
We hope this blog post helped you learn how to use the Smudge Tool in Photoshop. If you found this post useful, you may also want to check out the following resources:

