


Table of Contents
Are you looking into best practices when staging for real estate photography?
Home staging is preparing a listing to look its best for an upcoming sale. It can involve rearranging furniture, pairing back items in a room, making updates, and painting. The goal of home staging is to impress and motivate buyers.
Smart sellers and agents know that staging is also a powerful tool for real estate photography.
So, in this article, you’ll learn 5 best practices when staging a home for real estate photography. We’ll also share why staging a home for photography is a good idea.
Why Is Staging a Home for Real Estate Photography a Good Idea?

Let’s start by discussing why you’d want to do home staging for real estate photography in the first place.
87% of buyers report that photos are an extremely important part of the home purchasing process. Buyers see photos of the home as they begin their search online — before they ever step foot in the property.
Top-quality photos are crucial for a fantastic first impression and to get buyers to come to view the home. Poor-quality photos can sink a home’s sale.
Home staging for real estate photography ensures the home will be in the best possible condition for the photoshoot — also ensuring better quality photos.
Here are some stats showing the importance and value of staging:
- 25% of buyers’ agents report that staging increased their offering price
- Among sellers’ agents, 22% report the same findings
- 17% of all agents say staging increases the offering price by 6% to 10%
5 Best Practices for Staging for Real Estate Photography
1. Stage for the Camera – Not for the Showing

Always think from the perspective of the camera when staging for real estate photography.
Sometimes what looks impressive in photos isn’t that impressive in person.
Remember, you are staging for the camera right now; you can always make adjustments for actual showings later.
Consider these issues when staging for photography:
- Angles matter — will this angle look right, will it show off the best features of the room?
- Lighting often appears differently in photos — will the light hit these items correctly for the camera?
- Look through the camera lens first, when aiming for symmetry, perspective, flow, and so on
2. Lights! Camera! Action!
Effective lighting is a must for excellent, compelling photos. The right lighting makes a home look inviting and appealing.
Keep in mind the following lighting tips when staging for real estate photography:
- Brighten up a room for staging with as much controlled light as possible
- The angle and direction of the sun, plus weather conditions, can make a huge difference
- Open the blinds on all or some of the windows for natural illumination
- When working with natural light, avoid harsh shadows in the space
- Rooms tend to look their best with indirect sunlight brightening the room
More Than Industry Leading
Real Estate Photo Editing
PhotoUp is the end-to-end business platform for real estate photographers.

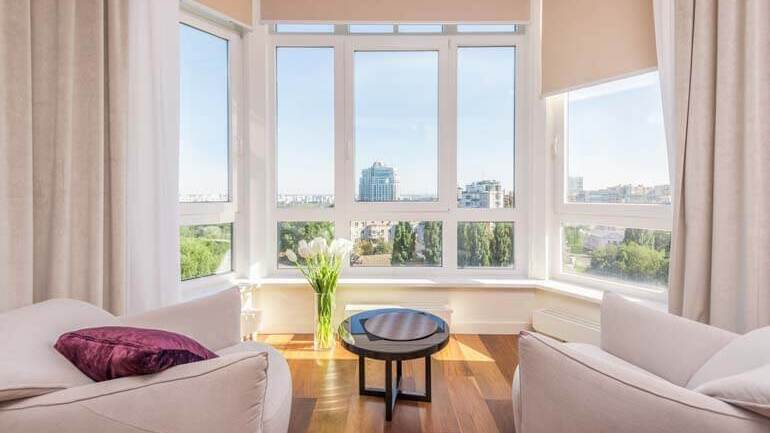
3. Don’t Forget the View Outside the Window

Even though your focus is photographing the interior of the home, the view out the windows will often become part of the photos.
Therefore, be mindful of what’s outside and in view:
- Is the view out the window a lovely garden, a seascape, or a pile of trash?
- Consider cleaning up and even staging the areas outside the window
- If the area can’t be cleaned up, consider covering the window
- One more detail — are the windows clean, without spots or streaks that will show on the images?
4. Strive for a Simple Color Scheme

You want to approach your photos like a fine painting — the color palette is extremely important.
Think carefully about color when staging for real estate photography:
- Is the room a mix of clashing colors and tones?
- Buyers tend to prefer simple, neutral colors
- Strive to have only one “color story” per room
- Too many colors can make the photographs look chaotic and visually noisy
- How do the colors look through the lens and in the images?
Make sure a room’s colors are not a source of distraction. Neutral tones, while perhaps bland, allow the buyer to imagine the home with their preferred colors.
5. Capture Patterns and Rhythms in the Photos

Color isn’t your only concern. Symmetry, repetition, and rhythm can be found throughout any room, and highlighting these patterns can be aesthetically pleasing.
Play with these ideas when staging for real estate photography:
- Symmetry can be found in the shapes of furniture, artwork, decor, windows, and even area rugs
- Repetition of colors, pillows, flowers, or themes can be pleasing
- Rhythm can be found in materials used, fabrics, glass, metal, and so on
Explore ways to make a space more aesthetically pleasing by using these simple principles of good design — it’ll make for better photos!
Let Us Share a Secret! Photo Editing and Virtual Staging Can Save You Time and Money!

Yes, buyers are strongly influenced by high-quality photos, making them more likely to want to see your house in person.
And yes, spectacular photos make a powerful first impression.
So, it’s easy to see why staging for real estate photography has become such an integral part of the home-selling process.
However, there are some downsides to actual home staging for real estate photography:
- Actual home staging can be expensive
- A photographer can only do so much to make your home look good
- Home staging requires much time and effort on the part of the seller
Quick & Easy
AI Virtual Staging
Interiors. Landscapes. Commercial. Virtually transform any space.
Consider these definite advantages of real estate photo editing and AI virtual staging:
- Photo editing creates the most polished, appealing, and professional online presence for any property
- Virtual staging is cost-efficient — the price for one virtually staged room averages 95% cheaper than actual staging
- Turnaround times for virtual staging are typically just a few days
- Virtual staging is less disruptive to the seller while offering multiple style options for the same property


PhotoUp specializes in expert photo editing and photorealistic, fast, and affordable virtual staging.
Here’s how it works:
- Upload the photos of the spaces you want to be staged
- Select a design style set from our professionally designed digital furniture library. You can even customize each set
- We’ll send you proofs of each virtually staged room for you to approve and download
For more information, check out our AI virtual staging uploader video tutorial:
It’s really that easy. And your clients will love the results!
Final Thoughts
With PhotoUp’s professional real estate photo editing and virtual staging, you can create stunning images for a fraction of the cost of hiring a home staging service.
Sign up with PhotoUp’s today, and let us make you stand out as a real estate pro!
We hope this blog post helped you see the benefits of staging for real estate photography and learn 5 of the best practices.
If you enjoyed this post, make sure to check out the following resources as well:

