


HDR photography is a common style used by many real estate photographers. HDR stands for High Dynamic Range and the basic principle of the style is to capture an image that has pixels in all points of brightness on the histogram’s dynamic range.
When you open in an image in LR, PS or most other photo-programs you’ll see a histogram in the upper right portion of the program. This histogram tells you where the pixels of the photo are placed on the brightness scale. The left side of the histogram represents pure black and the right side pure white. A histogram with a high dynamic range stretches from one side of the histogram to the other with and peaks in the middle of the histogram – something like a bell curve that you might remember from school.
An image with a histogram like this will have good detail in both the shadows and the highlights with no blown-out areas but most of the image will be in the mid-tones – i.e. the middle of the brightness curve.
The Art of Shooting HDR

In order to achieve this type of histogram, many photographers find it beneficial to shoot bracketed images and then combine the images using a program like Photomatix or LR-infuse.
What are bracketed images?
In the film days, the most common type of photography used to be shooting a single frame to get a single resulting photo. With the advent of digital photography and digital editing programs, it became possible to shoot multiple frames and then combine them into one composite image. Shooting a bracket of images means composing your image and then shooting 3, 5, 7, or more frames at different brightness settings in order to later combine these images together into a composite image that will be the photo you’ll print or share.


image by Josh Drovdal
The most common type of bracketing is either -2, -1, 0, +1, +2 or -2, 0, +2. In this case, 0 represents the most neutral exposure possible – it would be what the camera gives you if you’re shooting in an automatic or aperture priority mode or what you feel to be the best possible exposure for the frame if you’re shooting manually. -2 represents two “stops” darker exposure from your “best” exposure and +2 represents two “stops” brighter. You can of course bracket any way you want, but this typically gives you a good range.
Most cameras have an auto-bracketing feature that when turned on will automatically shoot in a bracketed sequence. You can set this to whatever settings you please but again -2, -1, 0, +1, +2 is the most common. Just set up your frame as you want it to be, expose the image to whoever is best for you, turn on bracketing and shoot your five frames. Remember, in order to do this a tripod is essential.
High-Quality & Consistent
Real Estate Photo Editing
Hire a dedicated editor with performance metrics from $7/hour.

Blending your images
The reason you are shooting these extra darker and lighter frames is to provide more detail in the highlight and shadow areas than one frame is able to provide. In the darker frames, the areas that were too bright in the middle/best exposure are often more properly exposed, bringing back detail to an otherwise all-white area. In order to bring back that detail in your final image, you’ll need to blend together these darker and lighter exposures with your middle exposure.
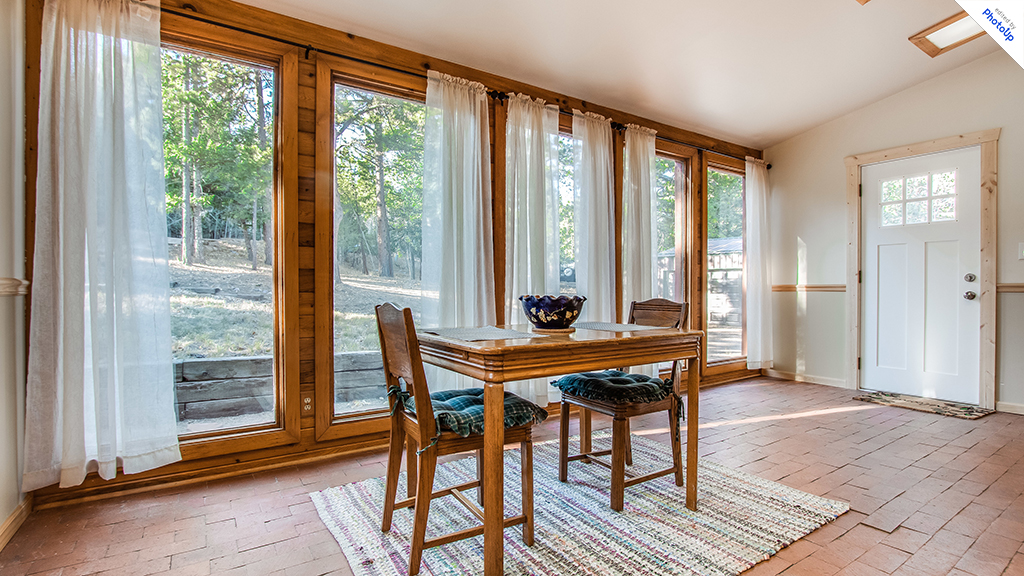
image by Josh Drovdal
The most common way to blend bracketed images is using an HDR program such as Photomatix or LR infuse. Although these programs operate differently and have different things you can adjust in your final blend, the basic idea of both is to produce a final image that has a high dynamic range with good detail in both the shadow and highlight areas. The program reads the files to be blended and creates a composite that hopefully pulls from the best part of each of the images. The result is a well-balanced, bright image with details in the highlights and shadows.
Why shoot in brackets?
The biggest boost that bracketed images provide is the ability to have detail in the shadow areas of images without needing a lot of extra lighting. Typically, brackets are shot using only available light, a method that often creates lots of deep shadows and bright highlights if only one frame is being used. Shooting brackets with flash is also possible, but less common – if you use this method make sure to set your flash to manual mode so that it’s power isn’t changing in each of the shots only how much light the sensor is picking up. Shooting flash brackets can help eliminate color casts caused by light coming in the windows or incandescent lights in the house but one of the huge advantages of bracketed HDR photography is that you don’t have to shoot with flash in order to light all parts of the image.
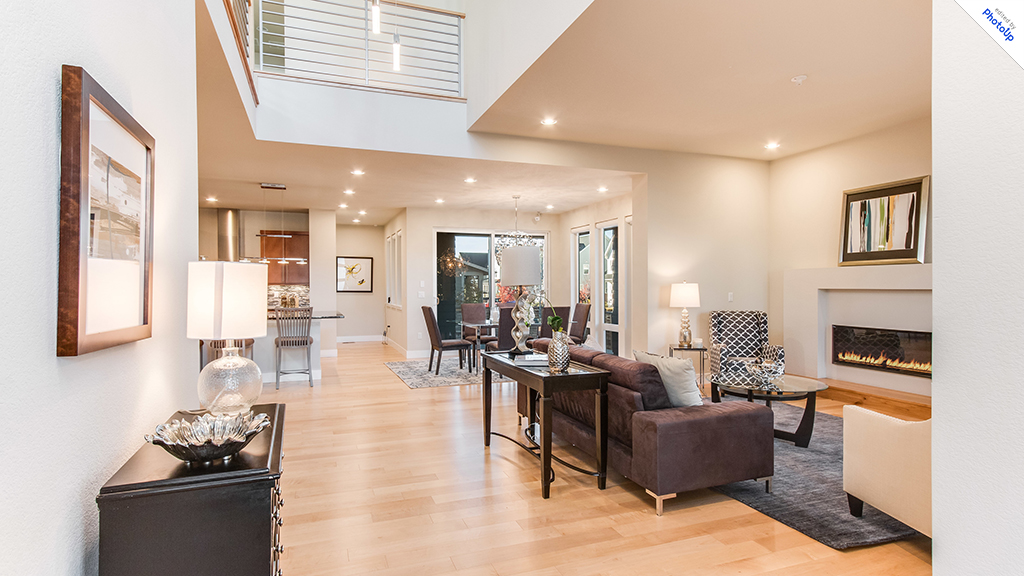
image by Josh Drovdal
Equipment you’ll need:
- A good and sturdy tripod – when shooting in brackets this is an absolute must have. As you’ll be blending five shots of the same scene together, these shots will need to be as closely aligned as possible. A good tripod with a remote trigger (or a timer set to fire the shutter 2 seconds after pressing the shutter button) can help you maintain perfect alignment between all the exposures in your series.
- A good professional or prosumer camera body – you don’t need the most expensive professional camera on the market, but you’ll need a camera that shoots in full-frame with a sensor that adapts well to low-light situations. Nikon’s D810 or Canon’s 5Div are examples of this type of camera.
- A wide angle lens – the biggest difference between a professional and an unprofessional real estate photo is often the lens. Wide angle lenses of 18 mm or below (preferably 15 or 16mm) will allow you to capture the whole room in the frame. This makes the room look bigger than it would with a less wide lens like a 24 or 35mm.
Other Suggestions:
When you have a bracket of images, there are many things you can do that you can’t do with just one frame. For instance, if you’re not liking the result the HDR program is spitting out – you could try your hand at manually blending the frames or let an editing company like PhotoUp do it for you. Another thing that becomes possible, is masking a darker exposure into the blended image in order to get a better window view. If you want a really great window view, try shooting an extra shot exposed for the view with a flash pointed directly at the windows to make for easier blending. An extra flash shot can also be blended with the HDR bracket on color blend mode in order to get better overall colors.
Check out this PDF file about Best Practices for Shooting HDR Photos in Real Estate Photography. Also, stay tuned for our next blog post about best practices for shooting single images!

